If you’re a fan of the delightful combination of chocolate and peanut butter, you’re in for a treat with these Butterfinger Balls. This no-bake dessert is not only easy to make but also incredibly satisfying. With a crunchy exterior and a creamy filling, these bite-sized delights are perfect for any occasion, whether it’s a holiday gathering, a birthday party, or just a sweet craving on a weeknight.
Reasons to Try Butterfinger Balls
These Butterfinger Balls are a must-try for several reasons:
- No Baking Required: Enjoy the convenience of a dessert that doesn’t need an oven.
- Simple Ingredients: With just a handful of common ingredients, you can whip up these treats in no time.
- Irresistible Flavor: The combination of creamy peanut butter and rich chocolate is a classic that never disappoints.
- Crunchy Texture: The crushed Butterfinger bars add a unique crunch that elevates the overall experience.
- Perfect for Sharing: Their bite-sized nature makes them ideal for parties and gatherings.
- Make-Ahead Friendly: Prepare them in advance and store them in the fridge for an easy dessert option.
“These Butterfinger Balls are a hit at every party! They’re so easy to make and everyone loves them!” – A satisfied home cook.
The Cooking Process Explained
Making Butterfinger Balls is a straightforward process that involves mixing, rolling, chilling, and dipping. Here’s a quick overview of what to expect:
- Prepare the Butterfinger Candy: Crush the candy bars into small pieces.
- Mix the Filling: Combine the crushed candy with peanut butter, butter, and powdered sugar.
- Roll into Balls: Shape the mixture into small balls and chill until firm.
- Melt the Chocolate: Prepare the chocolate coating.
- Dip the Balls: Coat each ball in melted chocolate.
- Let Set: Allow the chocolate to firm up before serving.
What You’ll Need
To create these delicious Butterfinger Balls, gather the following ingredients:
- 2 cups crushed Butterfinger candy bars: This is the star ingredient that gives these treats their signature flavor.
- 1 cup creamy peanut butter: Provides a rich, smooth filling.
- 1/2 cup unsalted butter, softened: Adds richness and helps bind the mixture.
- 2 cups powdered sugar: Sweetens the filling and gives it structure.
- 2 cups semisweet chocolate chips: For the chocolate coating.
- 1 tablespoon vegetable oil or coconut oil: Helps to thin the melted chocolate for easier dipping.
Step-by-Step Instructions
- Prepare the Butterfinger Candy: Place the Butterfinger bars in a sealed bag and crush them using a rolling pin or pulse in a food processor until you have a mix of small pieces and fine crumbs.
- Mix the Peanut Butter Filling: In a large bowl, combine the crushed Butterfinger, peanut butter, softened butter, and powdered sugar. Mix until you achieve a thick, cohesive dough. If it’s too soft, chill for 10-15 minutes before shaping.
- Roll into Balls: Line a baking sheet with parchment paper. Use a cookie scoop or your hands to form the mixture into 1-inch balls and place them on the sheet, leaving space between each.
- Chill Until Firm: Refrigerate the balls for at least 30 minutes until they are firm enough to handle.
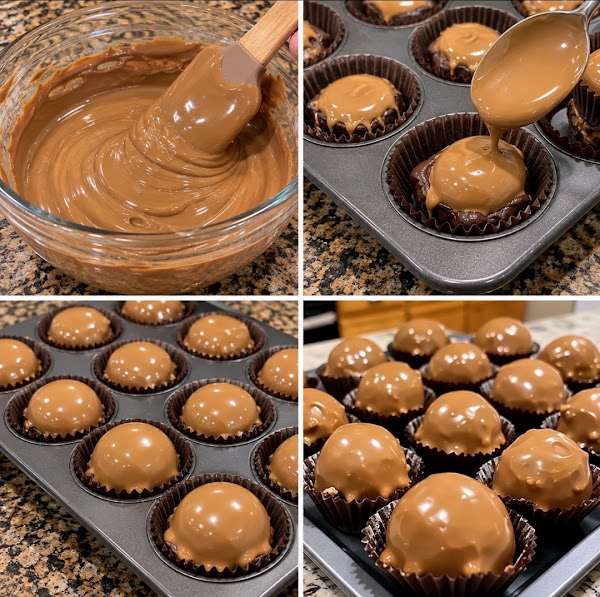
- Melt the Chocolate: In a microwave-safe bowl, combine chocolate chips and oil. Heat in 30-second intervals, stirring until smooth. Alternatively, melt over simmering water.
- Dip the Butterfinger Balls: Remove the chilled balls from the fridge. Using a fork, dip each ball into the melted chocolate, allowing excess to drip off before placing them back on the parchment.
- Let the Chocolate Set: Allow the coated balls to set at room temperature or refrigerate until the chocolate is firm. For a decorative touch, sprinkle some reserved crushed Butterfinger on top before the chocolate sets.
- Serve and Enjoy: Once the chocolate is firm, serve the Butterfinger Balls chilled or at room temperature.
Best Ways to Enjoy Them
These Butterfinger Balls are delightful on their own, but here are some creative serving suggestions: